A child’s smile is one of the most cherished images. Everyone loves capturing cute moments, but photographing children can be challenging! As I looked through my family photos – I saw too many instances where the picture could’ve been much better. As an avid and experienced photographer, I want to take adorable photos of my grandchildren. I have learned that capturing a great image depends on a lot of factors.
Of course – all of the basic rules of photography apply when photographing children. You should know your camera and what settings to use when (although many cameras have automatic settings that novices may find useful). You should understand the basics of composition and lighting. To help you take better photos of children, here are ten tips:
1. Take lots of photos!
Before digital cameras, photographers were often limited by the number of frames available on a roll of film. In today’s digital world, the sky’s the limit. When photographing children – don’t stop shooting. You never know what children are going to do next!
2. Don’t limit yourself to posed photos.
A lot of child photography is posed. Parents and grandparents generally like portraits of their children all dressed up and beaming at the camera. However, children can easily become bored trying to sit in the same position and face the camera. If there are multiple children being photographed – it can become even more challenging to get that perfect shot. If you plan to take posed photos – try to take them at the beginning of a session when the children are more likely to cooperate.
Taking candid photos allows the children more freedom and they generally have more fun. This is where you capture those genuine smiles! However, it is more challenging for a photographer. The photographer must anticipate the actions of the children. Take lots of photos as children play – some of the most memorable photos are unexpected candid shots!
3. Vary the perspective.
Most cameras are designed to be held to capture a horizontal (landscape) image. This is great for scenic shots and can be very useful when photographing groups of children or if a single child is playing – a horizontal shot may be used to capture them in action.
Most phones are designed to capture a vertical (portrait) image. This results in a different perspective for the shot. Portrait images are generally good for one or two children and for any activity indicating height such as children on a climbing wall.
Cameras and phones can be turned to change the perspective from landscape to portrait and vice versa. Take advantage of this and use the perspective that gives you the image you like best.
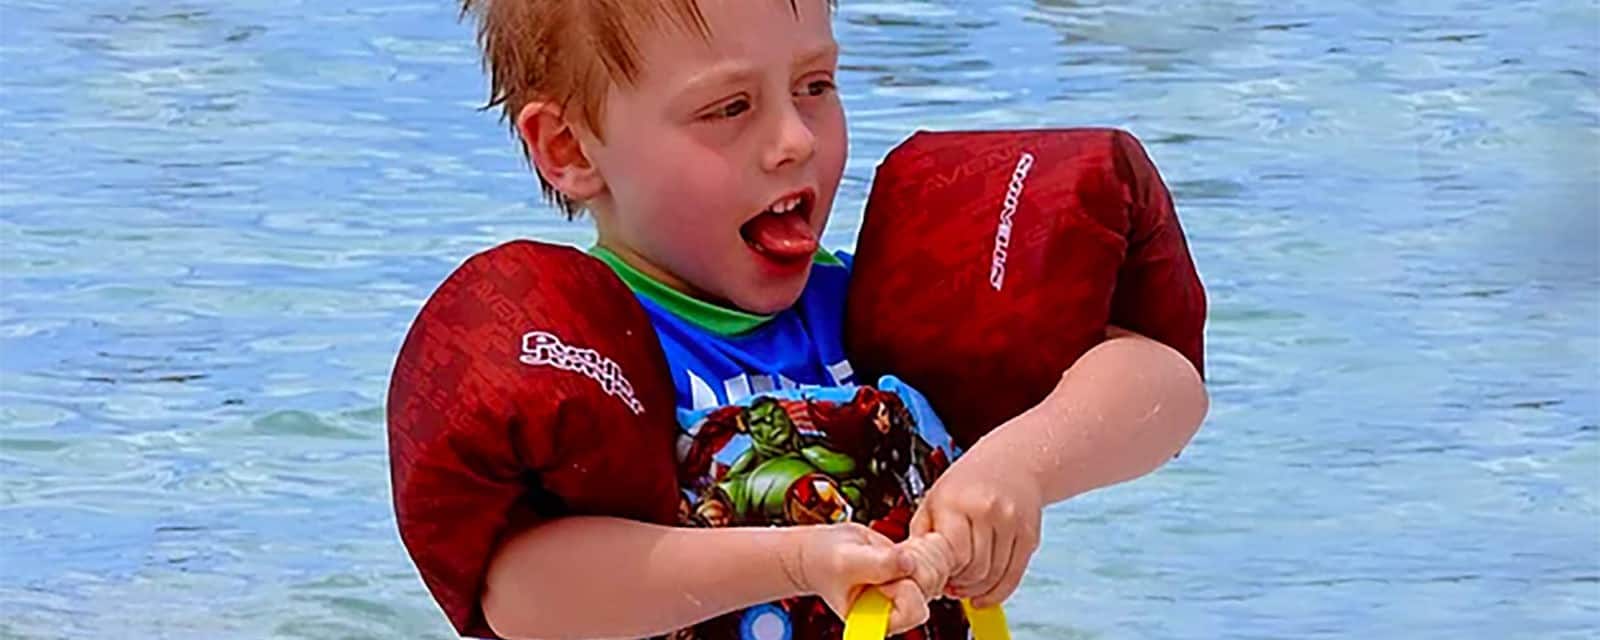
4. Get Low and Close.
When photographing children, you will generally get better images if you get down to their level. Photos from above may distort the child’s face. Don’t be afraid to get on the floor or the ground! Getting in close can result in a more impressive image. The child will fill more of the viewfinder and image area thus reducing room for distractions and leading the eye to the desired view. It is easier to capture facial expressions if the photographer is at the same level or slightly lower than the subject.
5. Change the height of the camera.
This is closely tied to the previous tip. Try taking the photos from different camera heights to see what you like best. If you take a photo of a young child from above, it may skew the child’s features or you may get the top of the head instead of the face; however, if the child is looking up, you may capture a really unique and flattering image. If you lay on the ground and shoot an image from below, you can also get a different perspective. The child may appear larger and you may be able to use the sky as a background if shooting outside.
 6. Move the child around in the frame.
A lot of novice photographers always center the subject in the frame. This may result in an acceptable image, but does not always give an interesting shot. A common photo composition guideline that may make images more interesting is known as the Rule of Thirds. A “Tic-Tac-Toe” board is superimposed on the viewfinder and the child is placed on one of the four dots where the lines intersect. For children, the eyes are generally placed at or near the dots.
7. Take advantage of the environment.
One photography trick is to use other objects to direct the attention to the child in the photo. This is called framing. In outdoor photos – a set of trees, the ends of a swing set or other playground items, or buildings may be used to form a frame around the child. Even commonplace items like chain link fencing can be used to create a framed image. Indoors – a doorway, arch, furniture, or bookcases may be used to get the desired effect. Even the sides of a chair can be used to frame a child. The point is to draw the eye to the child or children in the photo.
8. Look for and incorporate leading lines.
Another technique that is used to direct the attention to the child in a photo is called leading lines. The lines can start at any point on the edge of a photo and lead the eye to the main subject. Leading lines may be straight, but they don’t have to be. Curved lines also direct the eye. In this photo – the techniques of framing and leading lines combine to direct the eye to the adult and child walking along the path. Note – the adult and child are in the center of the photo (breaking the rule of thirds), but the curved pathway and framing by the trees create a story.
9. Don’t be afraid to move around.
As a photographer, you shouldn’t limit yourself to a single shooting position. Taking photos from different perspectives – sides, front, back – result in different images. Changing the light source and angles can produce a dramatic result and you can sometimes get these effects simply by changing your position. Straight on photos are good for group shots and some activities, but angled shots may be more dynamic in other cases. Remember to also vary your camera height as you move around.
10. Leave room for action.
It is usually a more interesting action photo if there is room “ahead” of the action. For example, if a child is kicking a ball to the right – the more interesting photo has the child positioned towards the left with room on the right for the ball to “travel”.
Using these tips, you can capture more striking images and add dynamic photos to your family album. For more information, a Photographing Children course is available with all nanny training programs available at the Nanny Institute.
Recent Comments